Showing posts with label Tutorials. Show all posts

Wednesday 21 September 2011

Inspirational Card

Well my card today started with having my lunch hour in my car yesterday, I went to have a quiet moment and turned on the radio and listened to Jeremy Vine on Radio 2, he has a chat show and yesterdays theme was favourite Hymns, I’m not overly religious but I do prayer from time to time and I like to think there is someone out there for us all.

I have to say I found myself singing along and then I heard Onward Christian Soldiers, this Hymn has such memories for me as my Dad would sing it at the top of his voice mainly on a Sunday Morning because my Mam would listen to Mantovani Orchestra on her record player whilst baking and making the Sunday Roast.

So you could say that I was inspired  by the radio.

Prayer card1

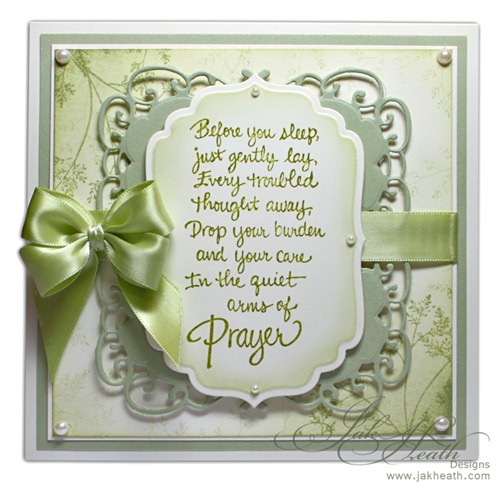
I simply love this sentiment, it is perfect for letting a friend or family know you care and this one is headed for a very dear friend of mine.

Prayer card2

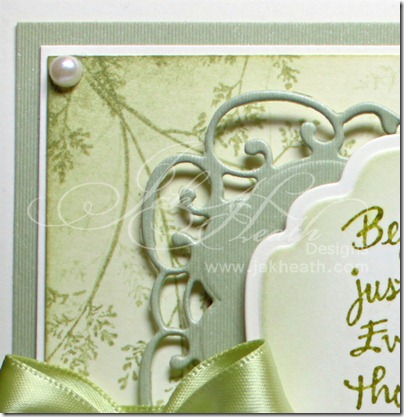
I distressed the background card in a sage coloured ink the used the same ink to stamp some sprigs on top. I used a Marianne Frame die for the sage frame then stamped the sentiment in a moss green ink and used a Spellbinders  Nestabilities label die to cut it out.

Prayer card3

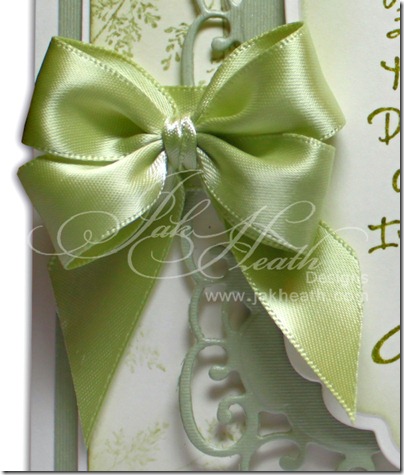
I finished with a couple of pearls and a green satin ribbon making a double bow from my Double Ribbon Bow Tutorial

The rubber stamp I used is called Stampendous M107 Prayer I have had mine quite some while so hopefully you can still get it.

Jak Signature

Wednesday 14 September 2011

double bow tutorial

I promised to get a tutorial video done of how to make a double ribbon bow and today I found a little time to sit down and get it made.


Friday 9 September 2011

My Video Tutorials

I know sometimes it’s a real pain when you want to find the video tutorials on my blog so I’ve updated my side bar with an easy access to them.

Just look for the picture of the video camera on my side bar and click on it, this will take you to the video tutorial posts.

video tuts

Jak Signature

Monday 22 August 2011

Promarker Tutorial Video Winner

Gosh I nearly forgot to do the draw for this, I’m going to blame it on a lazy Sunday, I was shattered after the Promarker class yesterday I forgot just how much a full day takes it out of me, still suffering with a bad back and it tends to go from being very uncomfortable to being unbearable and there is no warning sign in between. I think my days of full days tutorials and full days demo’s are numbered.

I totally forgot to take pictures on the day, but the class was amazing and all of their projects were fabulous, many of them were just needing the guidelines and the confidence to do it. I’m thinking they will be Promarker experts within a few weeks of practice.

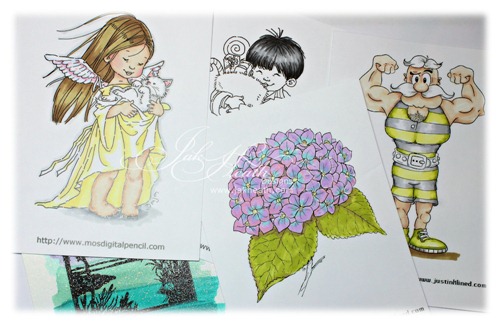
So here is a peek of what we did.

promarker class

We covered lots of topics from hair colouring to drop shadows and backgrounds to curved shading.

Thanks Mo “ Mo’s Digital Pencil “  and Just Inklined for allowing me to use a couple of your images.

So on to the winners of the Tutorial Video's.

114. Eve Hammond and 433. Fiona

If you could both drop me an email with the subject marked as Promarker Video Winner and include your details I will pop them in the post for you.

Jak Signature

Thursday 11 August 2011

Blog Candy–Promarker Tutorial

I’m not sure if this will do as blog candy but I have 2 to give away, as you all know I have a Promarker class coming up and I decided to make a tutorial Video lesson on a disk for the class to take home with them, a little reminder if you like simply because I have been to things in the past then by the time I get home I can’t remember how it was done. So I’m giving away 2 disks. You have until August 20th midnight GMT to get your names added to the Inlinkz.


PT candy


You do not need to have a blog to enter, just leave the URL blank.


Jak Signature


Friday 24 June 2011

A Card and some News.

First up is some news….


After doing my demo on Promarkers last weekend I was asked if I would consider doing some private tuition, I thought long and hard on what techniques would be needed and I have planned a class for Saturday 20th August.


It will run from 10am until 3pm lunch and refreshments will be provided.


We will not be making a card, I want to fit as much technique in as possible.


The class will focus on blending skills, colouring skin, colouring hair, shading and shadows and background work.


6 Promarkers and a technique DVD will be included in the cost of the lesson. I was going to do some information sheets but I think sometimes visual is much better to learn from and the DVD will enable people to watch at their leisure and practice.


It will be held at Image-e-nation in Washington Tyne and Wear.


I do have a few places left on the class so if you want to brush up on your colouring skills.


Contact me at jakheath@gmail.com for more information.


…………………………………..


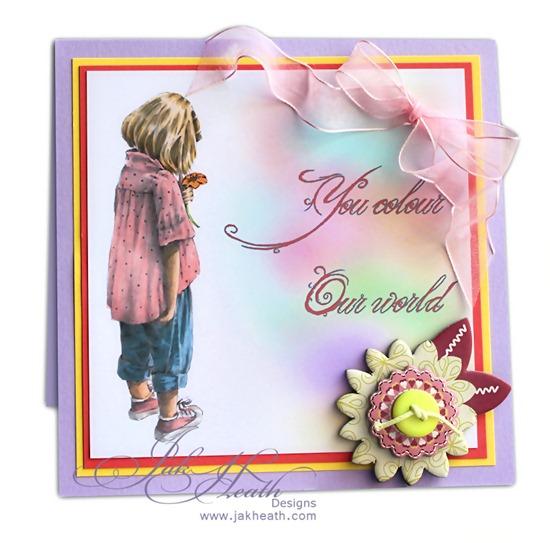
Secondly my card, not sure if I like this one now but as my Mam loves it I thought I'd show it anyway. Another digital image stamp called Melissa from Funky Kits, coloured with Promarkers and used my airbrush to add a splash of colour to the background. A pretty ribbon and a chipboard flower to finish.


152236-Melissa


Jak Signature

Friday 20 May 2011

Revert Back to IE 8 from Internet Explorer 9 Beta

Well to say I have been on a journey would be an understatement. I did what most of us do and when my computer asked me to update to Internet Explorer 9 Beta I jumped right to it.
I learned that blogger hated it, it wouldn't let me change colour of the fonts, add links to wording, spell check (believe me I need that one), centralise my posts or any of the usual editing tools. It hated downloads and when you are buying mp3 music or digi stamps it was a nightmare.
I tried Google Chrome and it was a little better but still hit and miss, Safari but it was a bit of a learning curve.
I soon realised that I needed to revert back to IE8, I thought that this could be done by re- downloading IE8 but no I couldn't.

So I started a google search of how to correct this problem I had.
I soon came across a site that helped me immensely and it was easy peasy lemon squeezy.
So if like me you are tearing your hair out and need to go back to IE8 this is what you need to do.

1. Go to your Control panel and find the Add and Remove Program icon and click on it.
2.when the new window opens look for the wording View Installed Programs and click on the wording.
3. This will bring up a list of all of the programs that you have updated.
4. Scroll down the list until you find Windows Internet Explorer 9 then click on the wording and then choose uninstall.
5. It will ask you are sure you want to uninstall this update Click YES
6. Once it has uninstalled it will prompt you to restart your computer, you must do this for the action to complete.
7. You may need to go through the process of set up for IE8 (it did it automatically for our 2 computers)

If you are still unsure here is the site that gives you step by step pictures to this.


Tuesday 26 April 2011

Ribbon Bow Tutorial

After being asked so many times how I make the bows for my cards and designs I have made a quick video tutorial for you all, I hope you find this useful


Thursday 24 February 2011

Monkey Hug by Mo Manning and Tonic Studios

it has been a while since I did any distress work and whilst at the Trade Show the gorgeous Kirsty Wiseman introduced me to Tonic Studios and they gave me a goody bag and are now sponsoring me, if you didn't already know they make many of the Tim Holtz tools so after a rummage in my bag I decided to give a couple of their tools a whirl on my card.

I had Monkey Hug on my craft desk all readty to colour on my return from the Trade Show so I set to it today, coloured with Copic markers and airbrushed the background to the image.
Tutorial on the distressing below the card image.


Tutorial with the Tonic Studios distressing Tool and the Craft Pick


Wednesday 16 February 2011

Easel card tutorial

I know I have been asked many times how to make the Easel base card so here it is, a little tutorial video, ideal sizing for the Nice n Easel decoupage by La Pashe, the board I am using is the ScorPal, love this board.

Monday 14 February 2011

Build a Blossom Tutorial Pansy

Do you remember me saying that I'd had a bit of a week at work last week and that Peeta my workmate was trying to steal my thunder. Well here it is a New Star is born I think that Tim Holtz will be quaking in his shoes when he sees our Peeta's Video.
Please leave some comments as Peeta is a bit of a diva and needs the compliments.


Wednesday 2 February 2011

Build a Blossom Tutorial - Gardenia

I thought it would be nice to show you just how I made the Gardenia Flower for this card so I've added a Tutorial Video to show you just how easy it is.
Build a Blossom Sheets can be found at La Pashe

Video Tutorial for the Gardenia Flower


Friday 31 December 2010

Copic Airbrush Tutorial

I thought it would be fun to show you a little tutorial with the Copic Airbrush you can get pretty much the same effect through sponging as the scene I have created but to be honest this takes a lot less effort and it is a great way of experimenting with it.

I will show another tutorial later of how to mask an image and add some shading around it to make your image pop but this one is more to talk you around the airbrush and to show you how easy it is to use.


Part 2


Sunday 25 July 2010

Aquamarker Card, Blog Candy and Tutorial

Coloured with Aquamarkers, ribbon ruffled down the card pretty paper cut at corn to slot the coloured image in. Gardeners string with an anchor charm threaded through and a bit of love to bring it all together.


Below I have added a video tutorial showing how i created the sky, sea and sand with the Aquamarkers, Letraset has given me some sets to give away.

Blog candy now Closed

So leave me a comment telling me why you would like to try these and post about the candy on your blog or shout out on your facebook profile with a link to here by Monday 26th July and I will choose 3 lucky winners to receive a set each. I will draw the winners on Monday at 10pm GMT


Saturday 22 May 2010

Vintage Shoe - Mother

Happy Saturday everyone,wowza it is hot, hot, hot here today, in a moment I'm going to be off to pick up my new car :) but I wanted to share this with you before I go.
Flowers and bead and lace oh my!

Lace edging around the heal and a tag with mother stamped onto it.


Top view showing the ribbon bundle that is slipped inside the shoe.


Now I'm not claiming the glory for this vintage beauty as it was created by a very clever lady click here to get the template and to watch the tutorial by her.

Tuesday 4 May 2010

Promarker Knowhow

You may have noticed that I have a new page link on my blog called Promarker Knowhow, I am aiming to share a few tips ideas and techniques to help those of you that are wanting to learn a little more.
I have just uploaded some information with images on how to colour fair skin.
Be sure to pop over and take a peek.


Monday 4 January 2010

Wedding Card Budget 3 with Template

Made using the matchbox fold, template below.
Top flap is scored where the ribbon is tied then embossed with the Swiss dots A" Cuttlebug folder the corners of the top flap has been rounded with a corner punch and the bottom edge punched with the Martha Stewart Flourish edger punch.

Attention to detail...

The butterfly is punched (Stampin Up Punch) once in gold then the next in the waste card then embossed with the Swiss dots A2 Cuttlebug Folder, iridescent pearls are used for the butterfly body the top embossed butterfly is glued at the body and the wings pushed upwards.


A few of you have asked for sizes of the finished cards and how it was made I have made a template with information of sizes and where to score.


Please note: Start with A4 size card.


Template is not to scale.


Sunday 1 November 2009

Nestabilitie Chrysanthemum Tutorial

It seems that many of you were interested in making this flower so I have made a tutorial for you as promised.


On to the Tutorial

Click on the Video and turn on the sound on your computer, I hope you understand my posh North East accent


If you have problems watching here I have also uploaded this to You Tube

Click Here for You Tube viewing


Friday 16 October 2009

Nestabilitie Christmas Tree Tutorial

I had fun with this, All the papers used are by Graphic 45, Nestabilities Circle scallop, green base card and ribbon Crushed Glass Glitter, Joanna Sheen has this in stock.
Also used a bit of green ink to distress the paper.


This is a picture took from the bottom so that I could show you the dimension of the tree.


Tutorial...

To make I used a double sided scrapbook paper now this is where you can get really creative, funky colours would look brilliant, if you don't have double sided paper then use a coloured one and use a gold or a silver marker and colour the reverse.

The Nestabilitie Scalloped Circle that I used was the second largest.

Cut the scalloped circle shape into pie like pieces you will only use 4 of them
Starting by cutting the shape in half you will need.
1 with 6 scallops 1 with 5, 1 with 4 and the last piece with 3 scallops.


Cut in between each scallop toward the point leaving about 1cm from the point uncut.


You can see on each scallop I have curled them upwards showing the patterned paper on the back, I curled mine with a bone folder but you could wrap them around a pencil or something similar.


Once all of the pieces are curled push your thumb into the back of each piece so that they are slightly arched

You can see in the next image that I added some crushed glass glitter to the curled edges, then I started to build up the layers using silicon glue, starting with the 6 curled scallops then overlapping with the 5 then the 4 and lastly the 3.
A Tree is Born.

All that's left is to add the card.